


Custom Playstation 5 Controller
Last December, my brother commissioned a custom controller from me.
Hello, there! Since I was in high school, I have enjoyed spicing up controllers, consoles, and even some toys with a custom paint job. I like taking something generic and making it unique. Back in the day, I took an Optimus Prime toy and gave it a new coat of paint to look like Nemesis Prime, it was glorious but I’m pretty sure that now lives in a box in my parents’ attic. Last December, my brother commissioned a custom controller from me. It had actually been a little bit since I had done one, and I had quite a bit of fun getting back into the swing of it. Okay, enough of the recipe blogger intro, first thing I did was draw up a couple of sketches for my brother to zero in on a design.
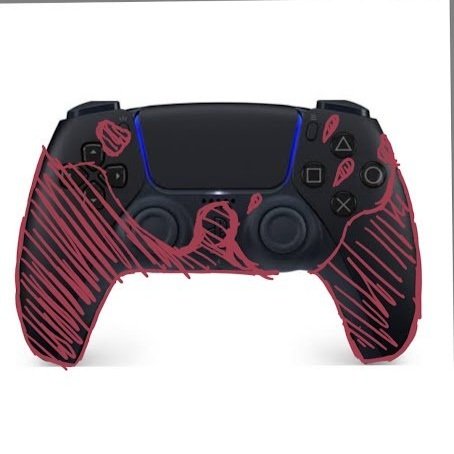
He knew that he wanted some kind of a splatter pattern. He had previously decorated a PS4 controller for himself, and went with a sort of paint brush flick, light pattern splatter. For the new controller, he made it clear that he wanted something that would look more cartoony, less speckled and more big drips of paint. I went with something that was intended to feel like it was thrown grips-first into a puddle of paint, with the splatter rising up from the bottom. For contrast, I did the sketch in red, but we both agreed that blue would be a good color for the final product as the red looked a bit too much like blood and that wasn’t what he was looking for.
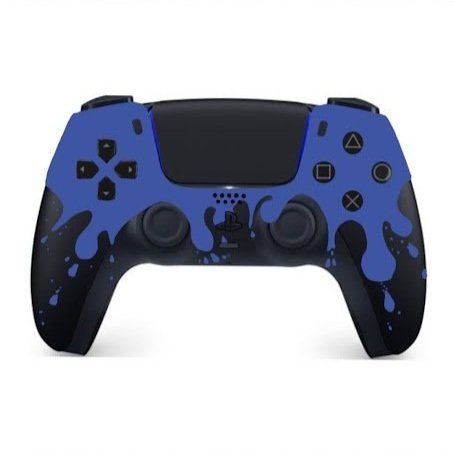
The main note he gave me was that the splatter would look better coming from the top, other than that, he requested more variety in the size of the drips. I think both of those ideas resulted in a much better final product, and he seemed to be satisfied with the result. I ended up following the concept above fairly accurately in the actual project. Now that we had decided on a design, it was time to get to work. Before I could do anything, though, I had to take the controller apart.
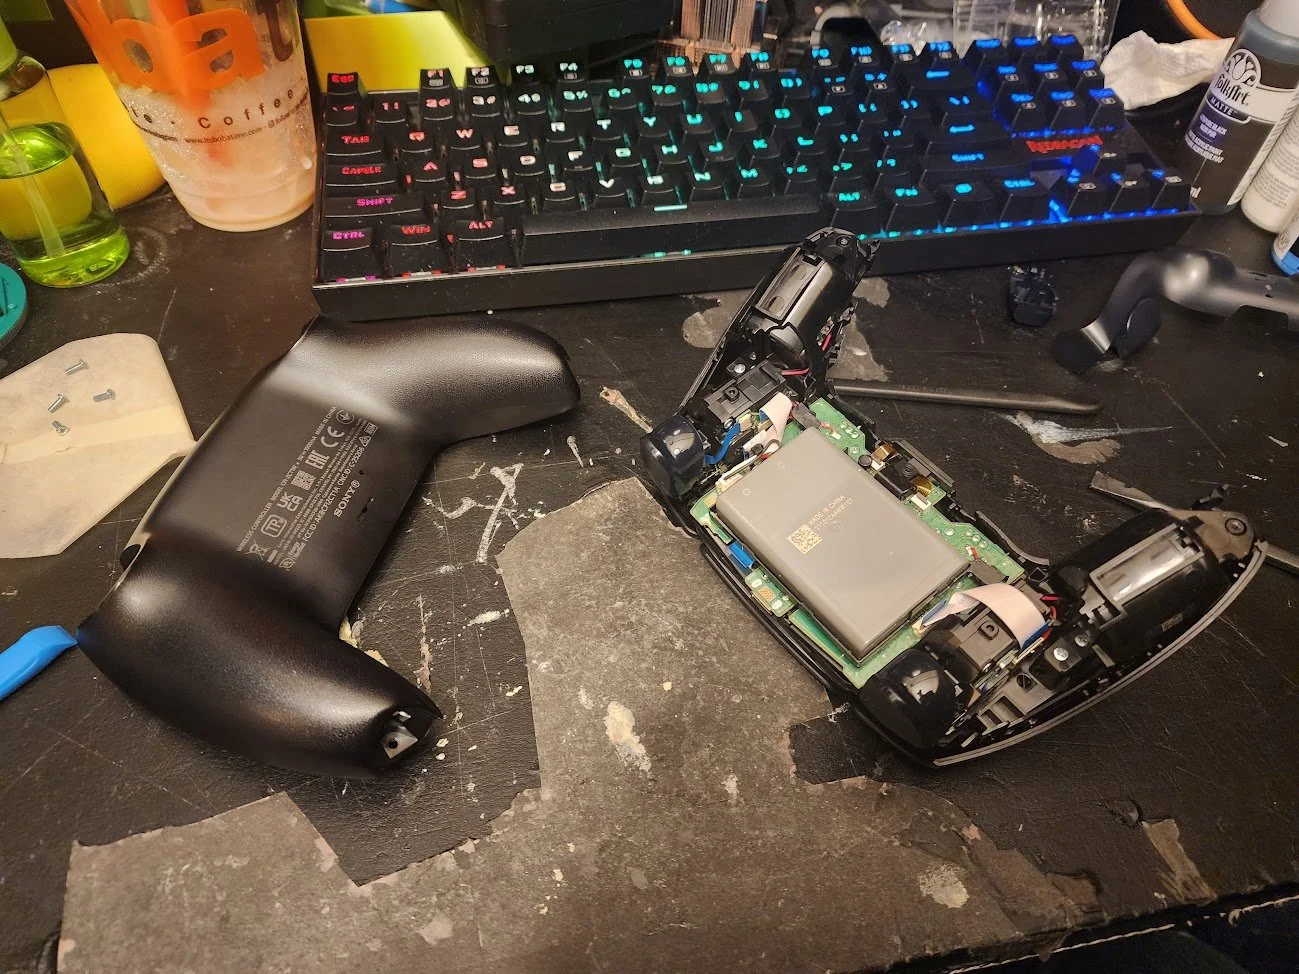
I was a little bit rusty, so I made sure to have a guide video up on the screen and went through the process meticulously- even going so far as to pull up a separate guide because the one I was using was for a slightly older model of the controller, and Sony had since replaced some screws with plastic tabs, presumably to save money on hardware. All in all, it came apart pretty easily, although I did have to disassemble more of the internal components than I would really have liked to be able to do this. On older controllers I worked on, everything was contained in a sort of inner chassis, with the outer shell attached to that, separate from all the components. These controllers have quite a few more features crammed into the same space, so they have had to get more creative with where ribbon cables are run. All to say, there was quite a bit of dismantling before I got to paint.

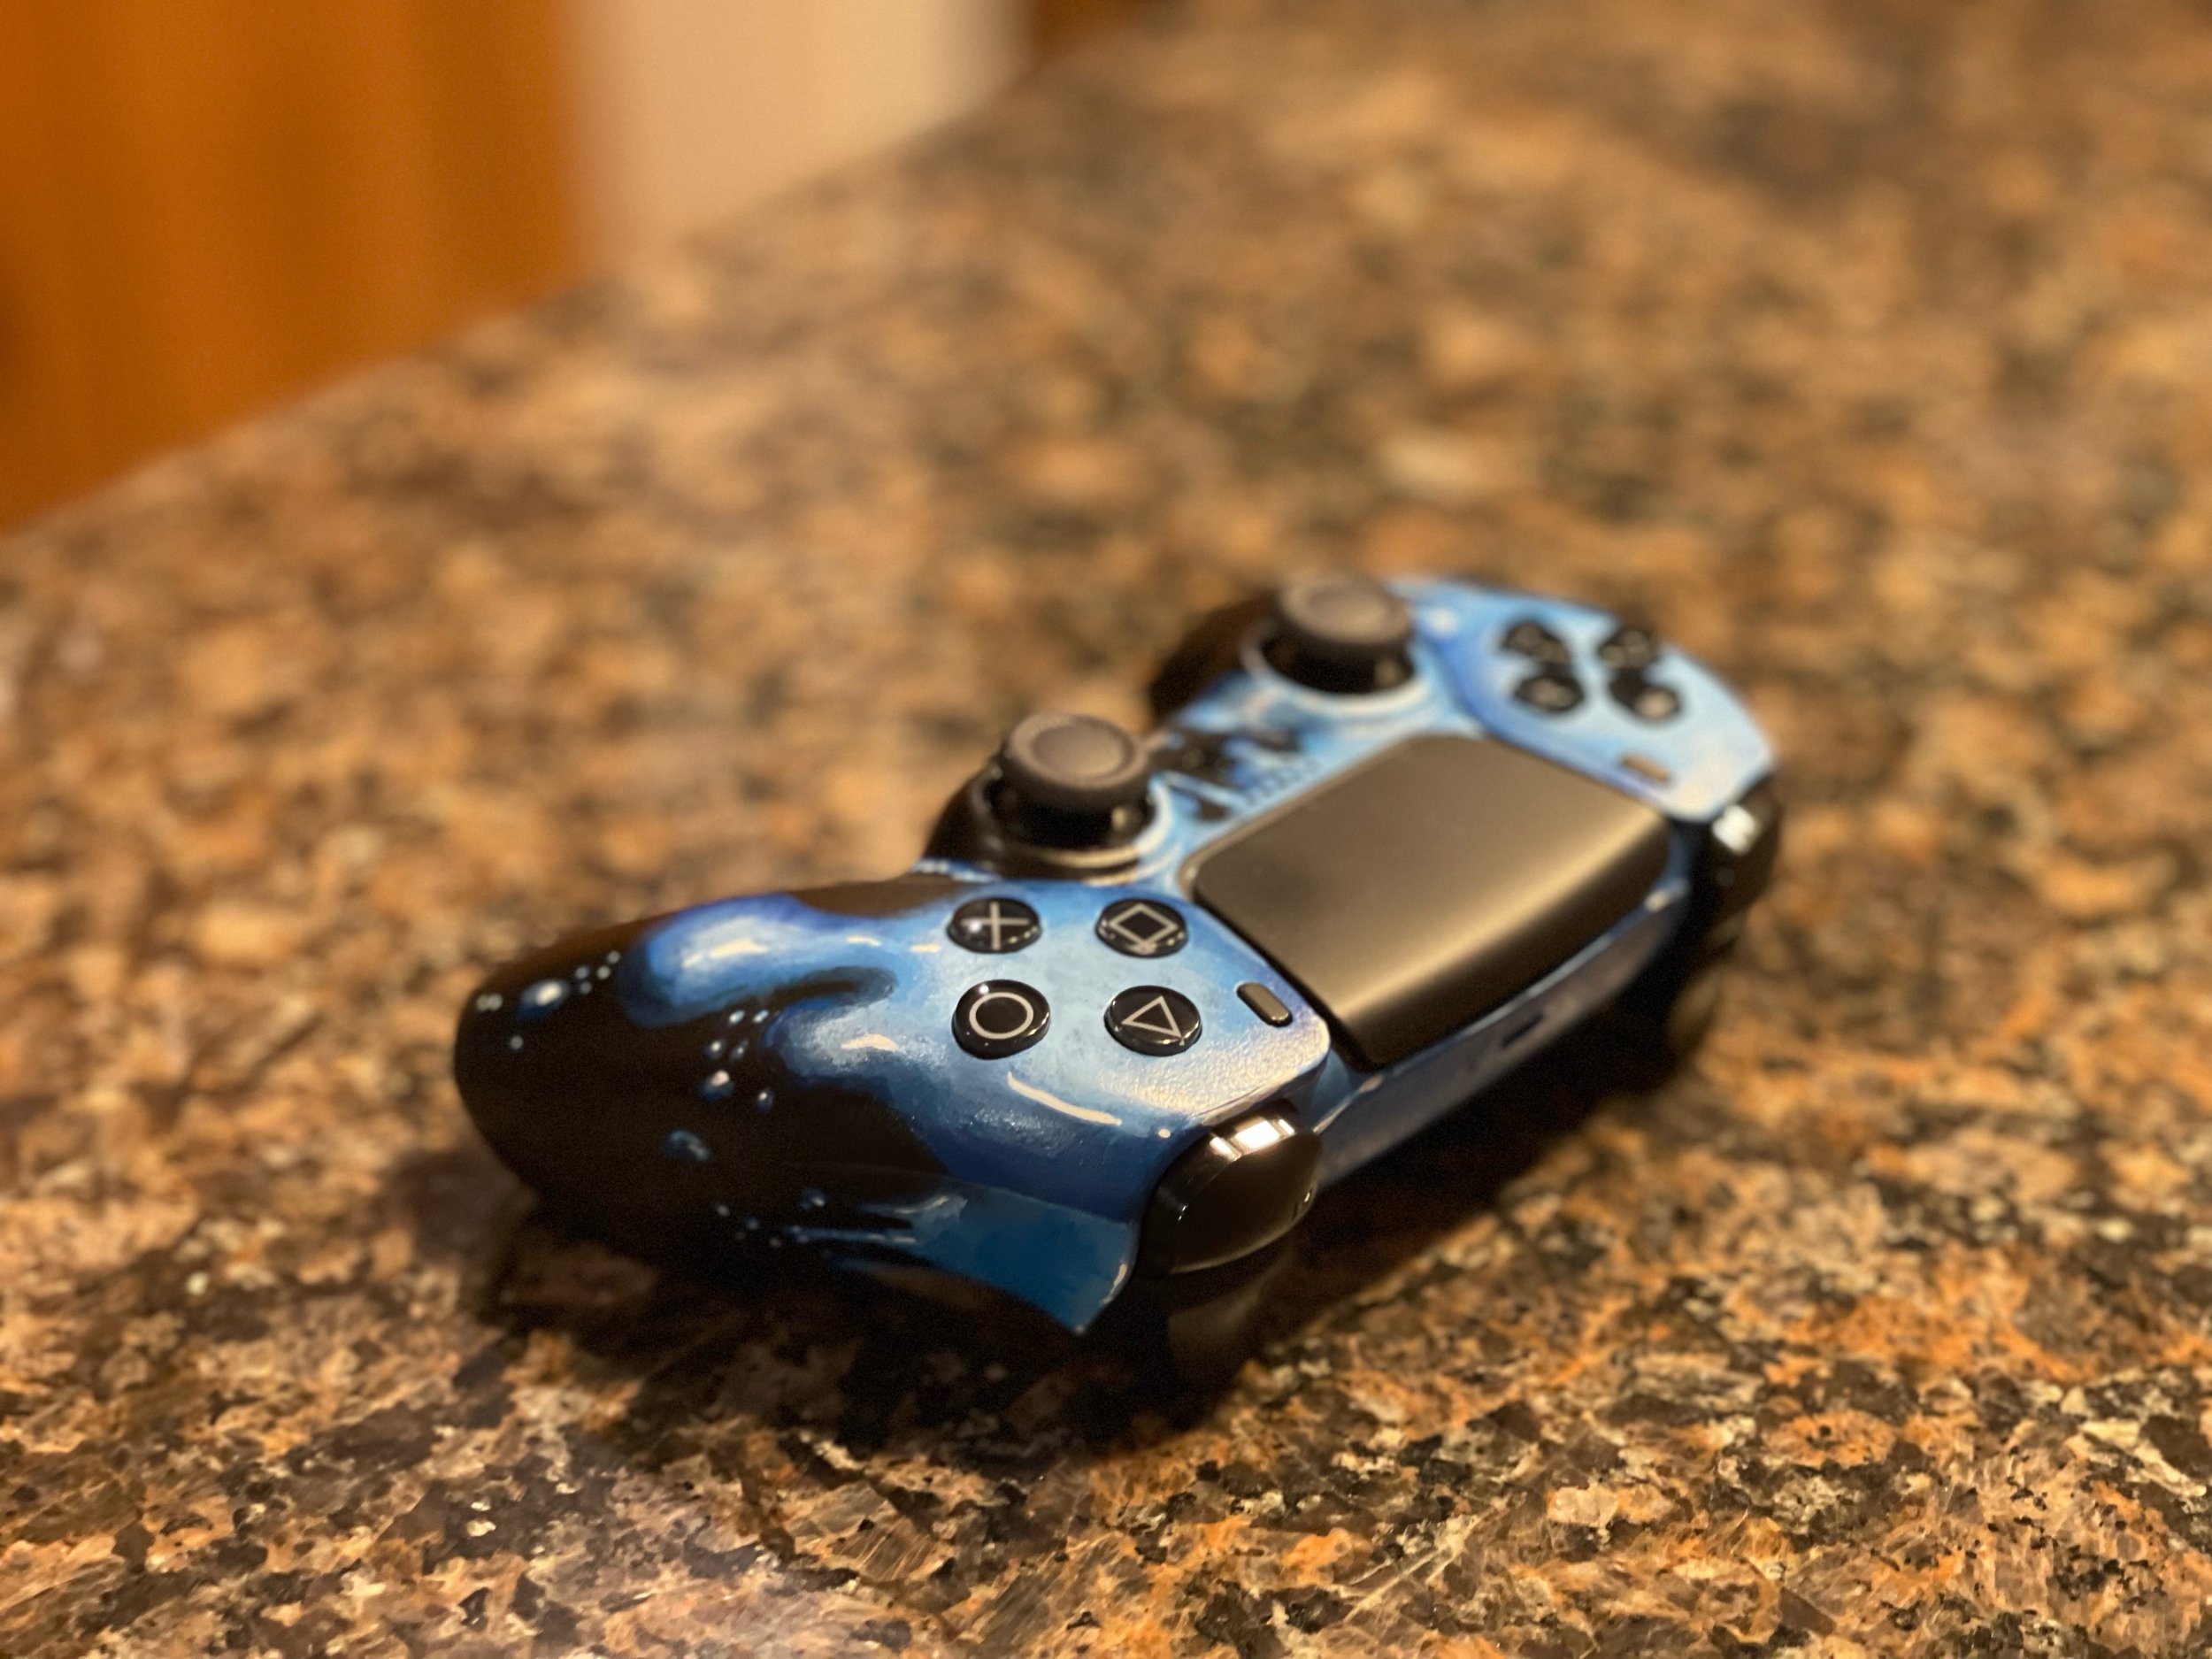
Not having prepared a concept sketch for the back, I just sort of flew by the seat of my pants. I think I managed to keep the same kind of splatter pattern as I have on the front, but I do thing that it looks a little too even, almost like all the globs are in a single file line, looks a bit weird to me, but it’s on the back. The front came out spectacularly, and looks just like the sketch but better. I painted this with acrylics, starting with a gentle sanding over the whole shell, and a layer of primer to make sure everything stuck nicely. I sealed it up with a couple layers of waterproof satin finish. My brother requested that it be shiny, but not so shiny that it outshined the painted shines. I think I managed to achieve that.
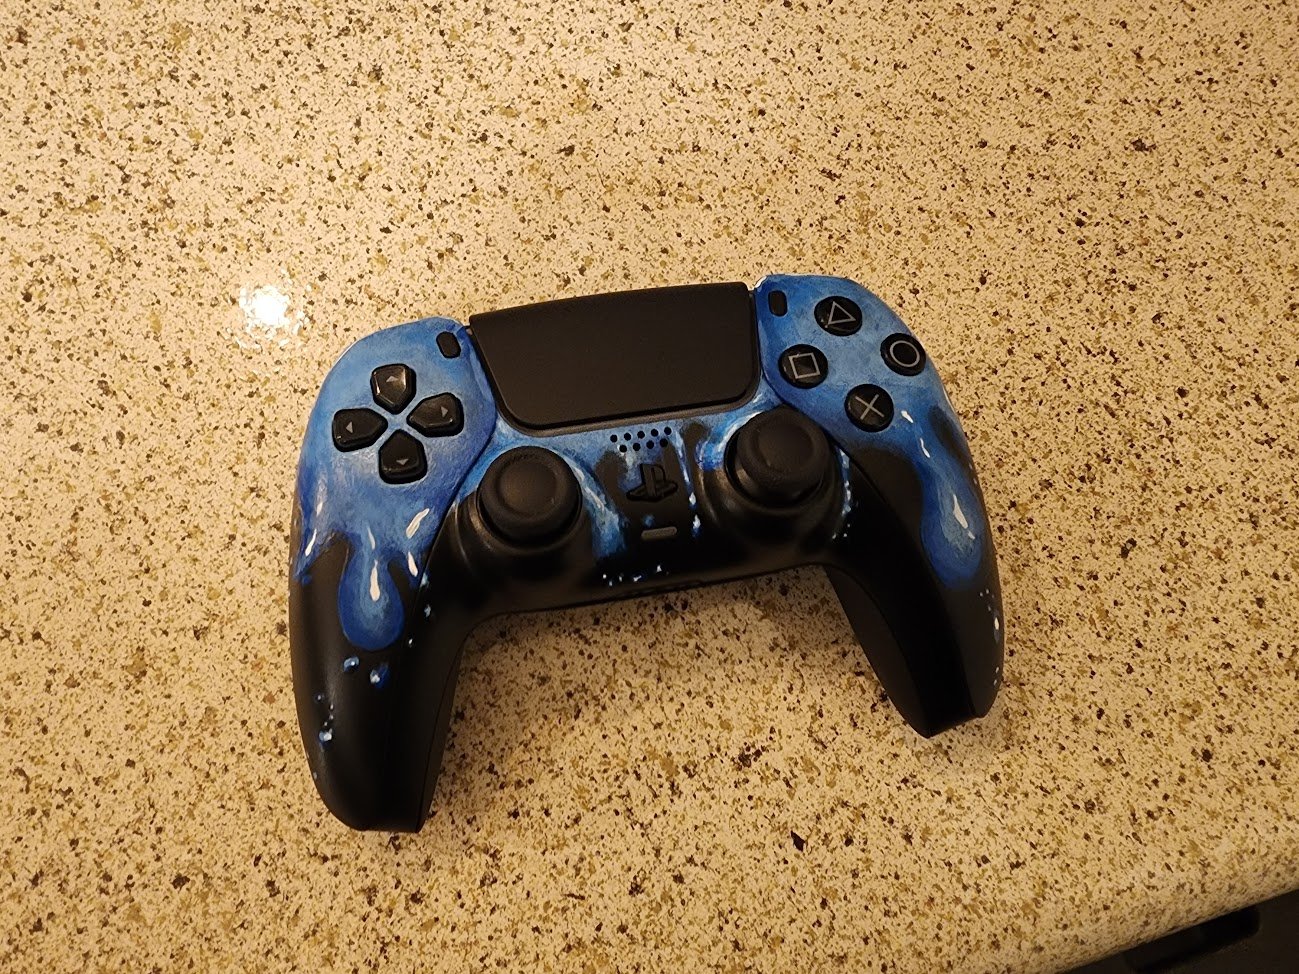
The controller came back together extremely nicely, everything fit the way it was supposed to for the most part. I did have a couple of minor snags, the front plate that goes around the thumb sticks and PS button is a sort of compression fit where it tucks in around the touch pad, with an additional layer of paint, that definitely took a little extra force to put back in there than it did during my test reassembly. The other issue was a little more significant. I didn’t notice that one of the function buttons at the top of the controller was sticking. Those small, oval buttons fit very snugly into the holes in the shell. When I painted, even with the masking tape I had applied, a small amount managed to drip into that hole and cause some friction with the button after it was reassembled. Picture not related, just a prettier picture on my brother’s counter:
I was able to fix up the stuck button fairly easily by taking the controller back apart, and scraping out the inside of the hole with a knife. With that fixed, the controller worked perfectly and Alex has been using it happily since. I have his other controller, a white one, with me in the Shoudio and I will be giving it a fiery paint job to complete the set. That will be going down over on the twitch stream, you can find me there at this link. I’m looking forward to doing more projects like this, if you would like me to customize a controller or console for you please reach out to me through the contact page. Thanks for reading! It’s been a blast as always. I’ll see you in the next one.

Shoudio MK.3 - I. Recap
Thought I could do a series of posts to talk about the Shoudio rebuild, and I figured I might as well start by recapping the previous versions.
Hello there! I hope you are well. Thought I could do a series of posts to talk about the Shoudio rebuild, and I figured I might as well start by recapping the previous versions. If you don’t know, I call my workspace the Shoudio, it’s a bad portmanteau of “shop” and “studio.” This is the second time that I have had to rebuild my workspace, and the first iteration was hardly a workspace at all. At that point, Emily and I were sharing a studio apartment in LA and there was barely enough room for the two of us to get around, let alone work on projects. I did anyway, though, and Em was extremely gracious dealing with my massive creations taking up 40% of the available foot space in the apartment.

I don’t have have many pictures of what my set up looked like at that point, but in order to film, I built a box out of some metal scrap and moving blankets. You can somewhat make it out in the background of my oldest videos. It was sharp and weakly mounted to my computer desk. Put a scratch in one of my monitors that is still there to this day. When I worked on large projects, I found myself out in the “dining” space of the apartment, if it could be called that. I flipped our table up onto its side and worked on the floor. It worked for a short time, but we shortly decided that we needed more room. I also had this whole bluescreen setup, it was massive. Keep in mind someone else lived here and this was most of the apartment. Emily is a saint.

When we moved into the 1 bedroom, part of the plan while shopping was to find one with a space I could tuck all of my project work into. That way, at least in theory, I could make all the mess I wanted and Emily would still get to have an apartment that she could, you know, walk around in. After some hunting, we managed to find a unit that was absolutely perfect. All of the space we were looking for, and the dining area was tucked into this discrete little alcove which, for some reason, had 3 electrical outlets in it. I couldn’t ask for better. I spent the entire time while we were touring that apartment thinking about what I could do with the space.
With my own dedicated work area, I could build the now-named Shoudio around solving some of my streaming and recording problems. One of the biggest pet peeves of mine had been how close my computer was to my microphone. The computer I’m currently using is liquid cooled, but it has some beefy fans. I was still using the same PC at that time, and in the studio apartment it was inches from my microphone, leaving most of my broadcasts feeling like they were shot on location in a hurricane. So I set the computer up on the opposite side of the room from where I would be doing most of my work. (For the record, there were actually two versions of this set-up, but for the sake of time let’s just say I thought two desks was a good idea, and it wasn’t. Here’s a pic.)


I ended up with a solid arrangement. My camera, monitors, peripherals and art equipment were on one side, and I had shelves with more tools, materials, and recording equipment on the other side of the room, with my computer at the bottom. The layout worked, but I still struggled with the size of the space. At the end of the day, I just didn’t have enough room to make everything fit in the space while still being able to actually get any work done. I ended up having materials and hardware overflowing to the patio cabinets, and projects dribbling out of my “contained workspace” and into the main hallway. Enter apartment number 3.
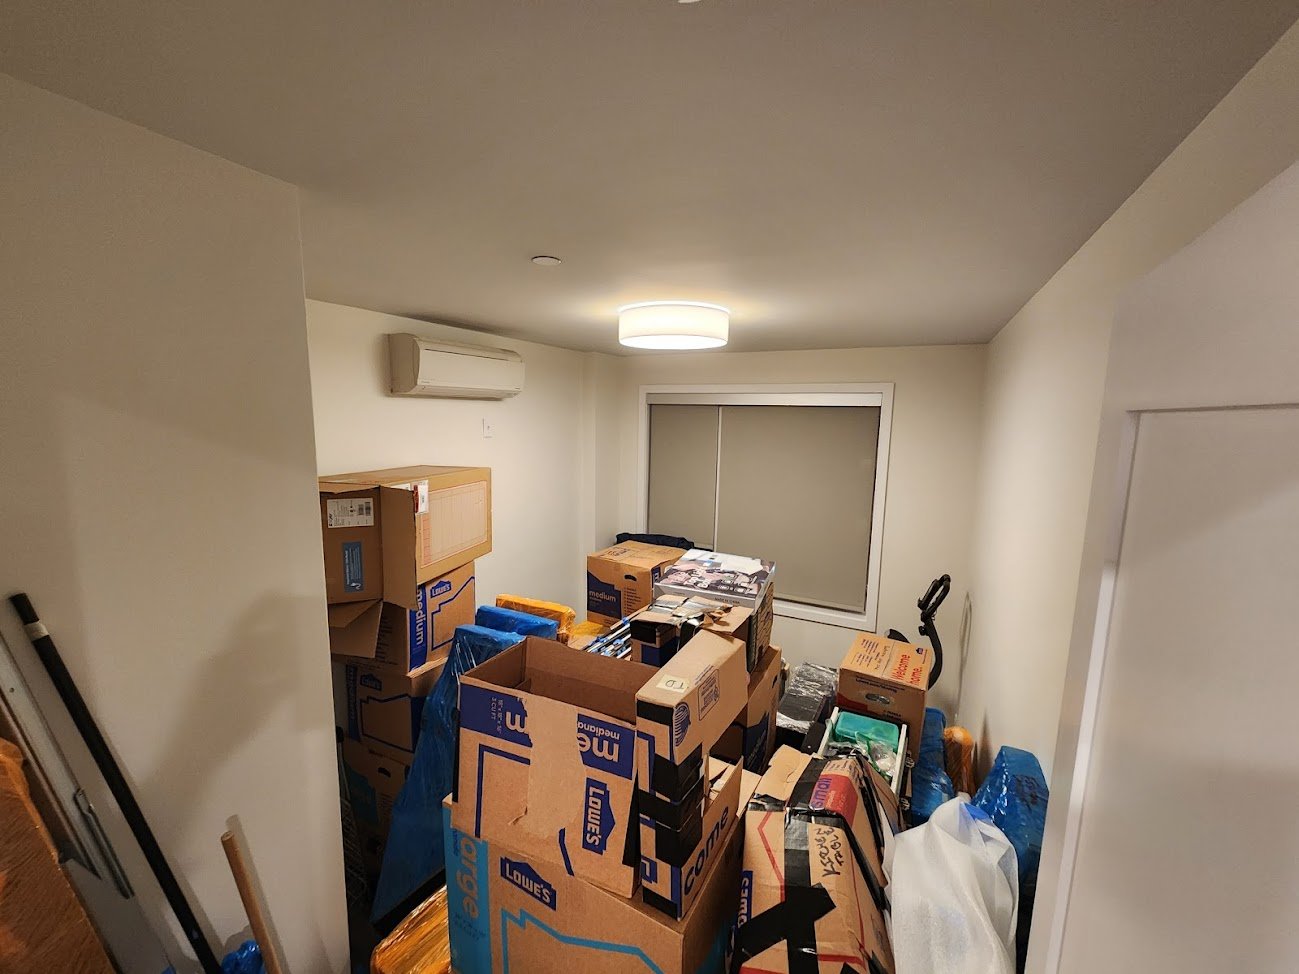
What we are working on now is definitely going to be the best iteration of the Shoudio so far. The new apartment is a two bedroom with a living room. Originally, Em and I were going to share the central bedroom as a work area, but we ended up both wanting more space. The solution was to split the living room in half, and give half of it to Em, and I took the whole bedroom. (I also absorbed some of our communal storage to help balance things out.) This is the new space.
I do have some major goals that I want to accomplish with this newest space. Some, like mounting the roomscale sensors for my VR headset and hooking my turntable up to the computer are already about done, but there is still much to do. For starters, I am working on some new sound panels, which will be covered in another post I am working on right now, I have improved on the design I used in the last Shoudio. I also want a painting corner that vents outside, which should be more than doable. I have a corner dedicated for that task already.
What I really like about moving so frequently, at least for now, is that I get this chance to tear my whole workspace down and rebuild it using what I’ve learned from living and working in the previous iteration. I know that I need things laid out in a way that is visible for me, I need room to spread out the project I’m working on for the same reason, and it’s best if my storage is broken up by the type of project rather than the type of tool, and stored where the project is done or put on wheels so I can keep things within arms reach while I am working on. I have a rolling cabinet that has not done much rolling but, in this new space, I think I am going to have much more room to breathe.
I know this isn’t a super juicy post, but there is more to come! Stay tuned, it’s been a blast as always. See you in the next one!
Everbound - Map Layout
Happy to share an update on my progress with the video game concept, Everbound.
Hello all!
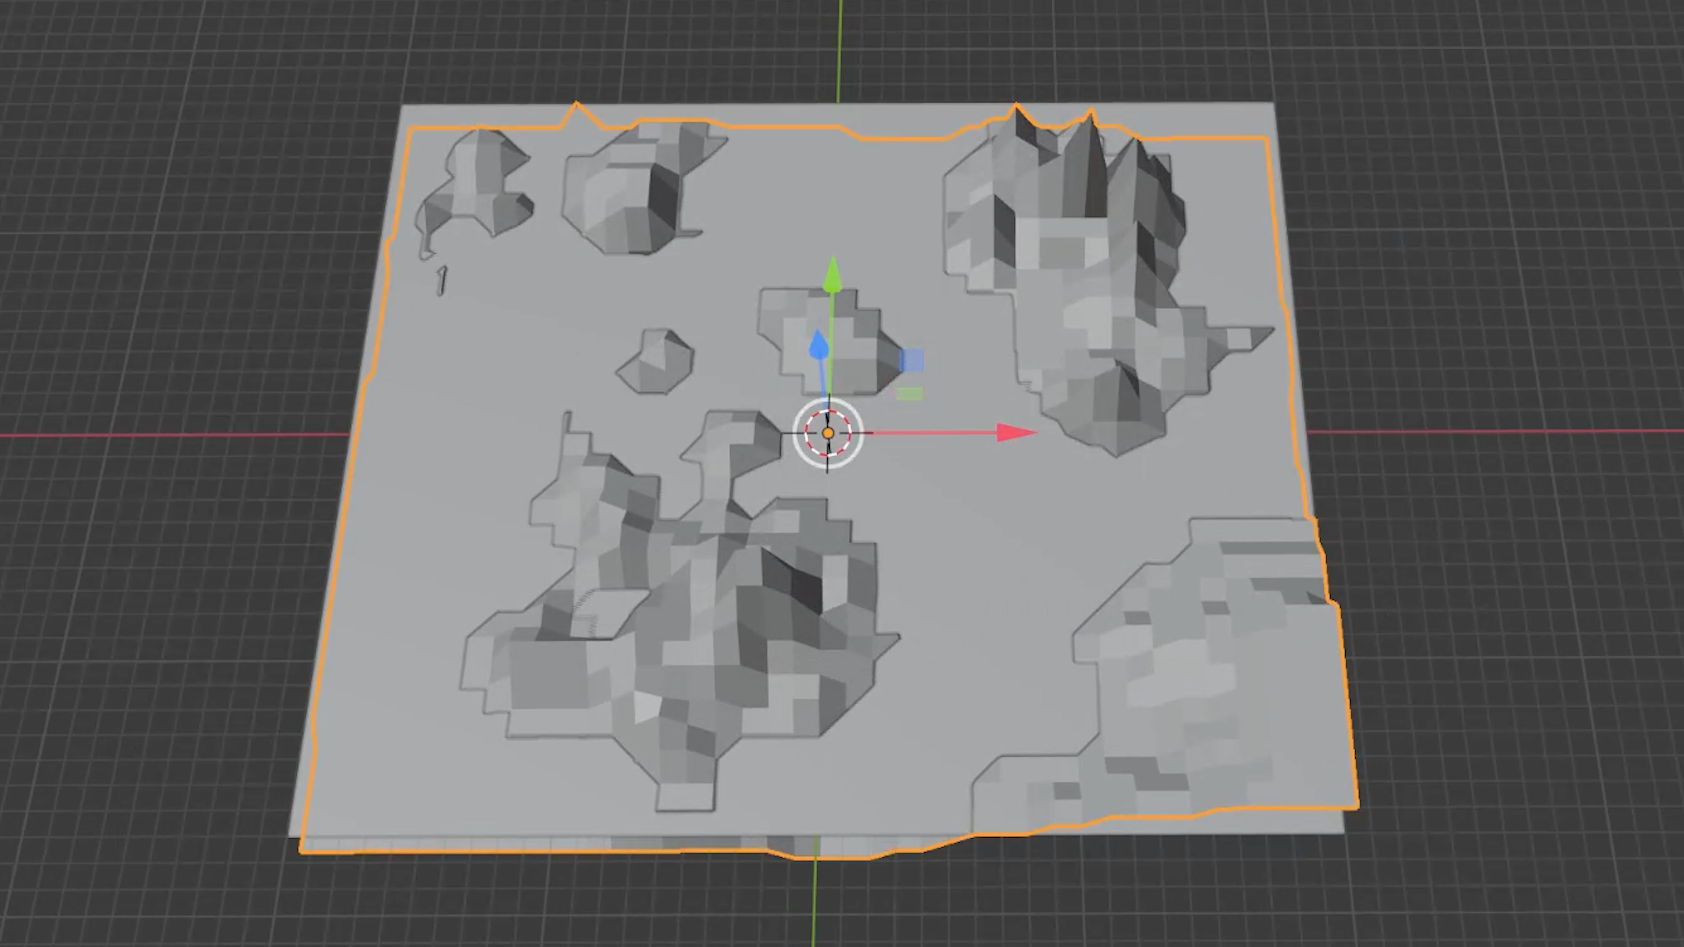
Happy to share an update on my progress with the video game concept, Everbound. In a recent livestream on Twitch, I focused on creating the 3D map layout for the game. It has been thrilling to finally see the map come to life as I make more and more progress. In this stream, I was able to get the map roughed out at a high level of detail, and more or less outline a plan to complete the map.

The process started with a 40x40 grid of squares, with each square representing 1 kilometer, and my hand-drawn map scaled up to match. I followed the topography lines on the map and set the depth levels at 1km increments to maintain a 3 dimensional grid. Most of the terrain was fairly straightforward, but some areas heavy with detail -such as small islands or narrow passages- were a little more difficult to represent accurately without a finer touch.
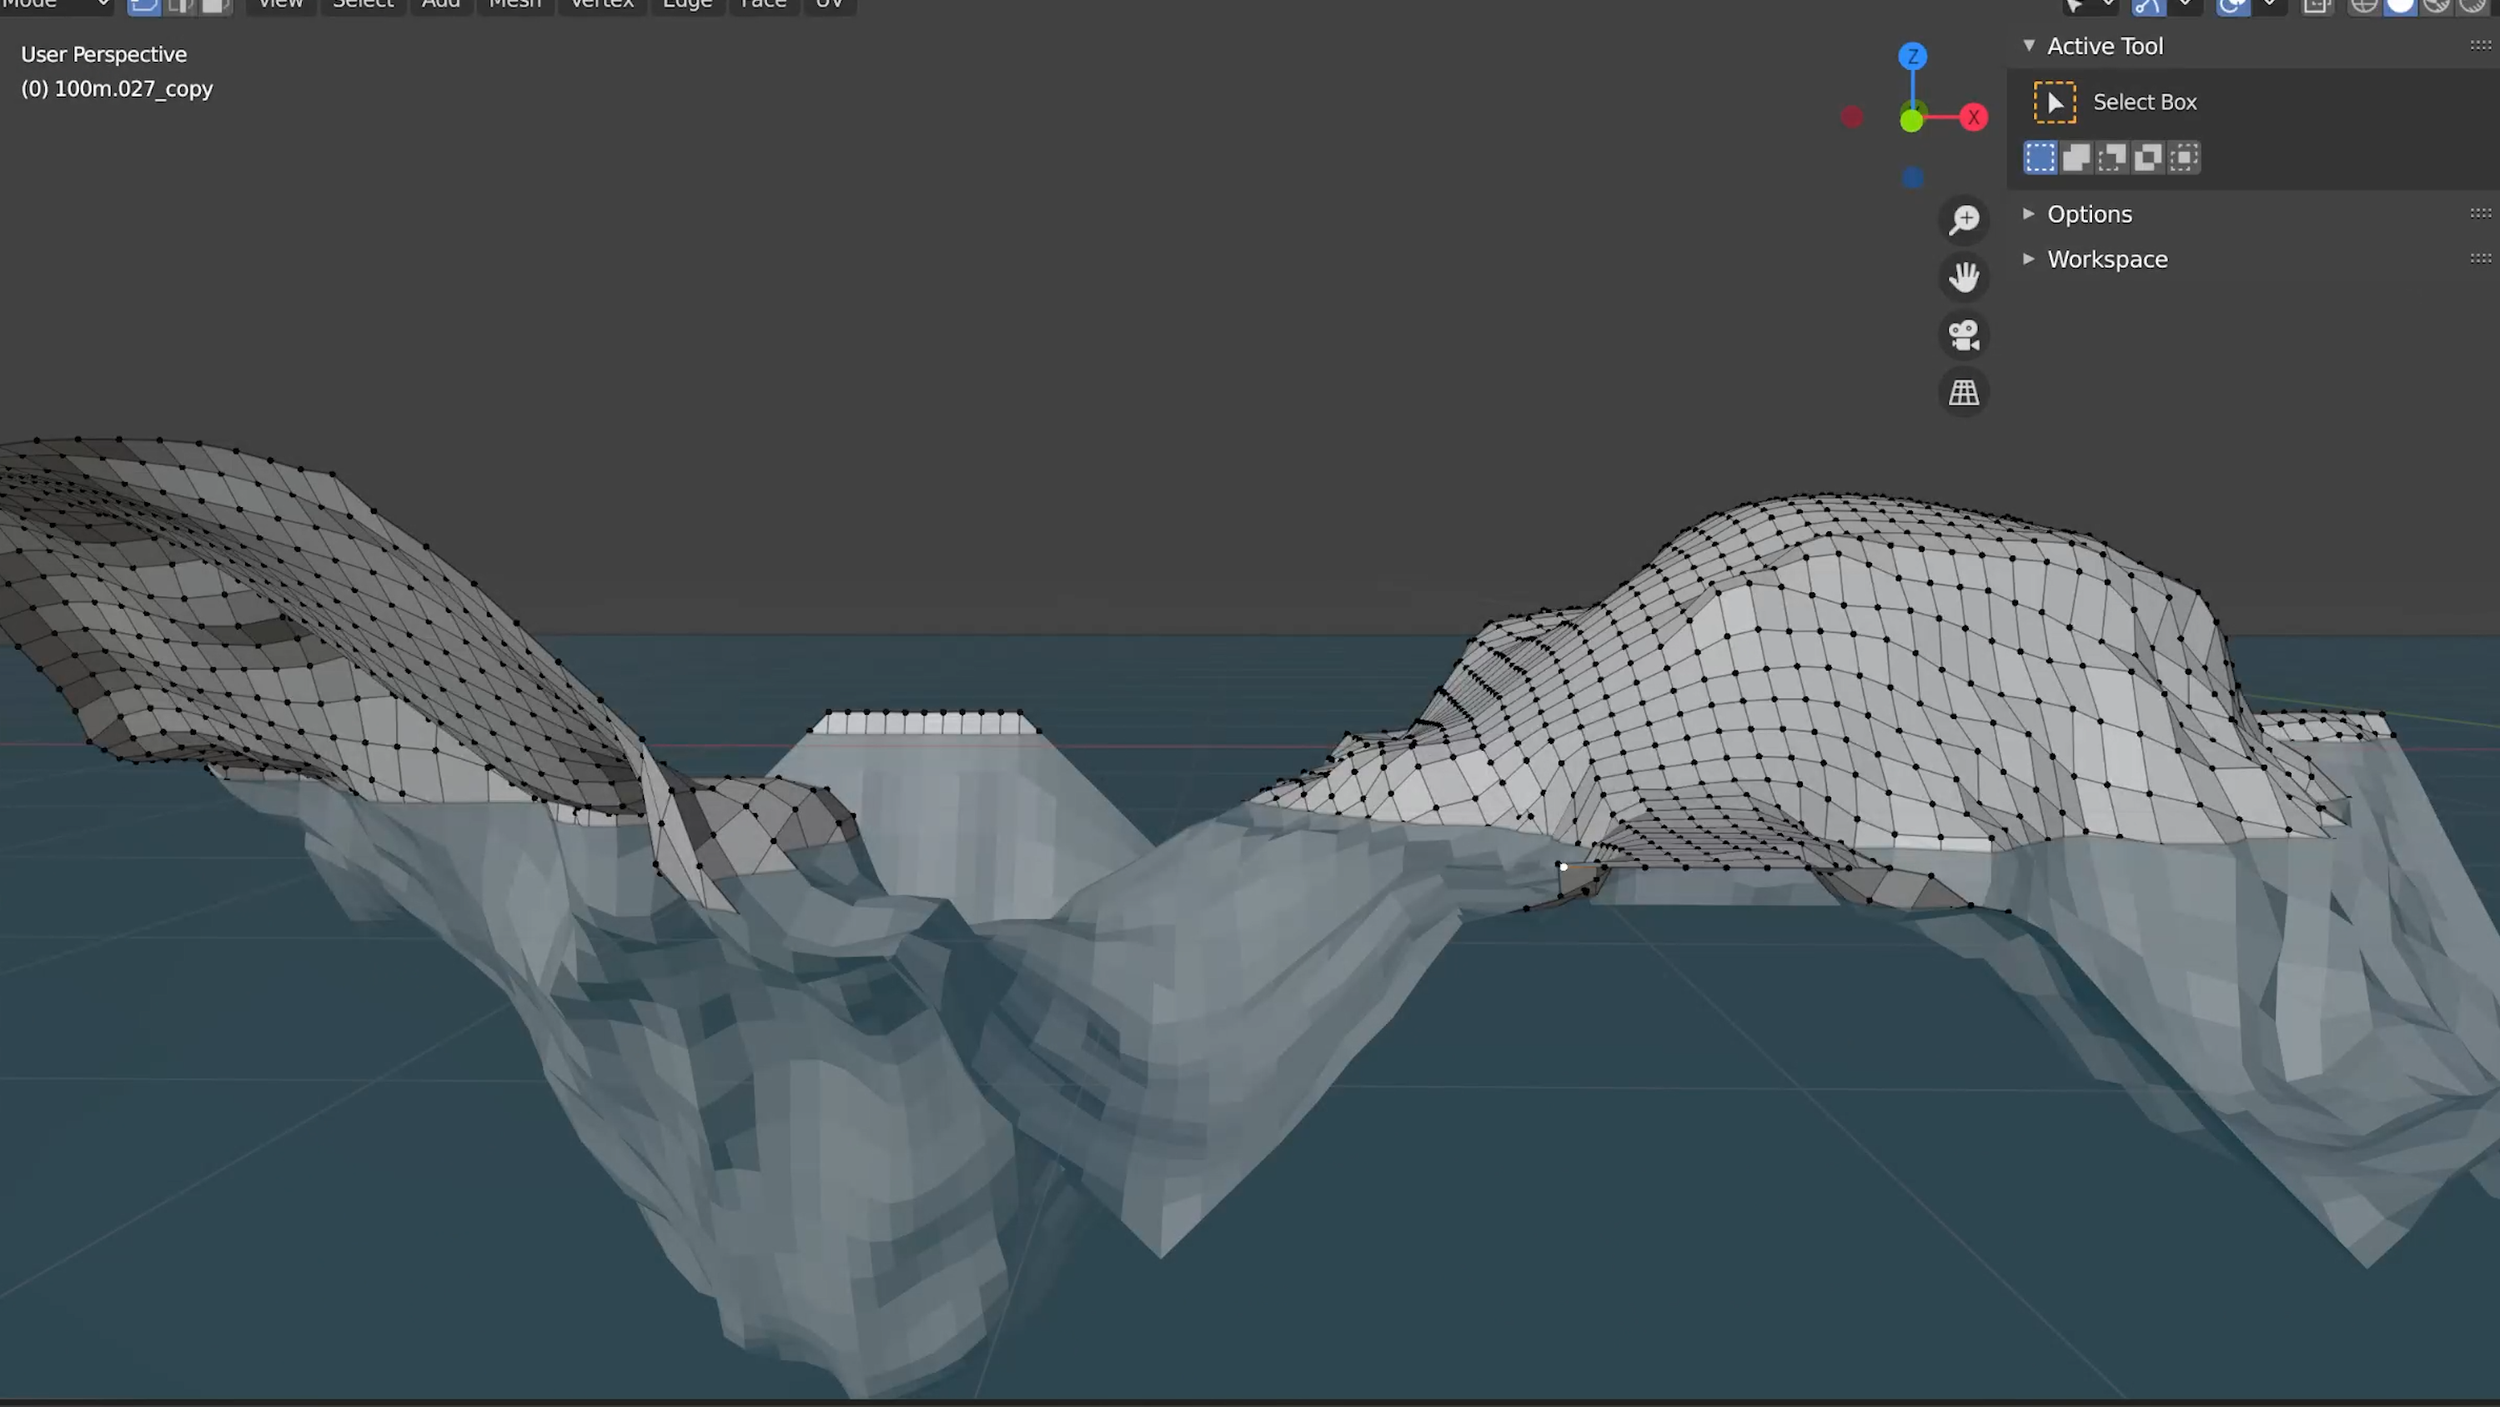
In the second half of the stream, we zoomed in on a particular section of the map known as Crown’s Ridge. I selected that section of the grid and separated it from the rest of the mesh, increasing the resolution using the subdivide tool. I set it to 9 subdivisions, leaving us with a grid size of 100 meters per square. I added a flat mesh at water height to help show the coastline, and with a recommendation from chat we were able to make that plane transparent to create a more realistic water effect which made it much easier to visualize the progress.
To achieve this next level of detail, I switched over to sculpt mode and first smoothed out all of the sharp corners from the lower resolution map, then I carved ridges and added mounds and hills to the surface of the mesh. I did my best to visualize rainwater flowing down the surface. I wanted to think about how water creates a positive feedback loop and, the more an area is eroded away by the rain, the more rain is drawn to that path and the deeper the scar becomes. This became more relevant after the stream, while I was working on the volcano, one of the largest landmasses on the map.
By the end of the livestream, I had completed the second level of detail for 2 of the 64 sections into which the map is broken up. As I mentioned, I continued working after the stream and managed to complete another 4 sections. The map is fairly large, but I don’t intend to complete this level of detail across the entire map before moving on. My plan is to focus on the areas where I have already made progress before moving on to the rest of the map. I want to add more surface details and buildings, as well as establish a visual style and gameplay mechanics in a small testing area before rolling through the entire world.
There is still a lot to be done, but I am excited to see how this game evolves as I continue to work on it, and I can’t wait to share updates with you all. Thank you for your continued support and encouragement as I bumble through the world of game design, it’s been a blast as always. I’ll see you in the next post!

Welcome to the New Blog
Get up to date on all things unenlightened.
Hello there! Welcome all to my brand new blog. I know I’m not much of a blogger, but I’m hoping this will help me cast a wider net and I am beyond excited to start sharing my creative journey with you all in a new way. If you found yourself here and you don’t know who I am, my name is Austin! I run a small YouTube and Twitch channel where I explore all things art and creativity. From trying out new techniques to making things from scratch, I love to share my passion for all things creative with as many people as I can.
In this first post, I wanted to share a little bit about what you can expect from this blog. I have some amazing projects coming up that I can’t wait to share with you all. From walkthroughs and theories, to behind-the-scenes looks at my creative process, there will be something for everyone. Most posts will be a companion to one of my YouTube videos, so whether you prefer watching videos or reading, I’ve got you covered. These blog posts will essentially be text synopses of my videos, with added stills and possibly some short clips to supplement the text.
Many of the projects I work on are ongoing and will receive updates as I make progress. From my open story video game concept, Everbound, to my custom chatbot, ue_botman, many of my projects are constantly evolving. So, instead of showing you the entire project from start to finish, each post will be like a chapter in an ongoing series. Each post will showcase the progress I’ve made since the last post, highlight any new features or developments, and give you a behind-the-scenes look at my creative process.
I hope this blog will serve as another way to connect with you all and inspire you to pursue your own artistic endeavors. Thank you for your continued support, and I can’t wait to share more with you in the coming weeks and months. I hope I’ll see you in the next post, it’s always a blast!